How to setup Auto Open Cash Drawer Connection to Printer on CatchFood?
To setup Auto-Open Cash Drawer, You May Utilize This Guide To Properly Configure The Connection Between Your Cash Drawer And The Printer. Your Cash Drawer Should Be Plugged Directly Into The Back Of Your Printer Via An RJ11/RJ12 Cable (These Look Similar To Phone Cables). Specific Setups Vary By Your Printer Brand, We Have Listed Setup Information For CatchFood POS/EPS Printers.
- Follow this steps.
- Ensure the cable is plugged into the correct port on the receipt printer.
- Ensure that the other end of the cable is plugged directly into the cash drawer.
- Go to Download Center to download our Printer Driver.
- Once downloaded and installed, turn on your printer to ensure printer is connected and recognized.
- From the Windows search menu, search for Printers & scanners (or Devices & printers depending on the version of Windows).
- Click on your receipt printer in the list of printers and click Manage.
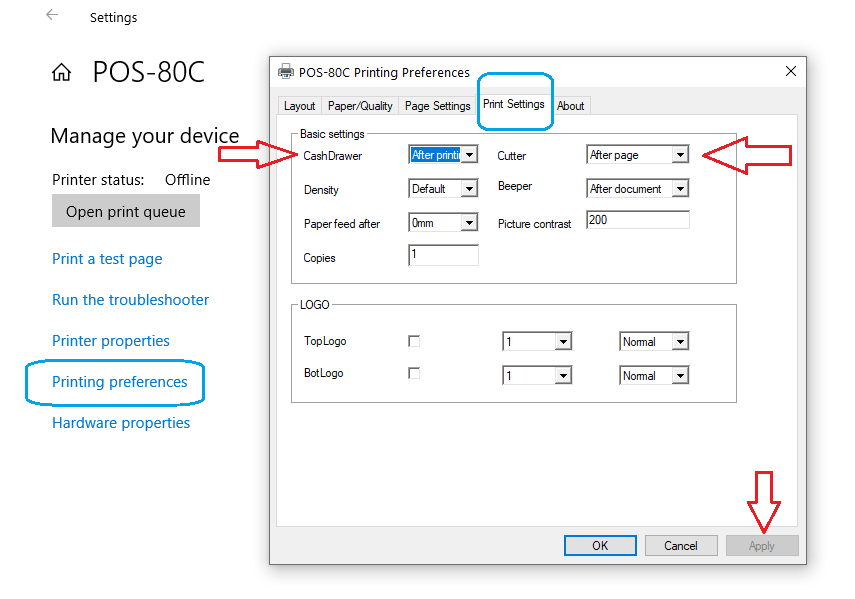
- Click on Printer preferences.
- Click on Print Settings.
- You should see Cash Drawer tab and click on the dropdown list for Drawer Type.
- Select "Open Drawer Before Printing" or "Open Drawer After Printing" depending on your preference.
- Press Apply and OK to save the settings.